Instruction STUB
Laser Engraving Mirrors
Original by Jason | Nov 17, 2016 | Hardware & Electronics, Software
Choosing an Image
Grey scale images do not translate well on to mirrors because either the surface is reflective or it is not. So straight 2 color images with no gradients are best. Just plain old black and white. The higher the resolution the sharper the edges.
Resize and adjust
Next is open the image in Photoshop (or any image editor Paint.net is a free alternative), then resize it match the size you need. It is best to set the pixel resolution in your image editor as well. I use 100 px/cm or 0.1mm. I find the best quality with my setup at that resolution. Typically, a higher resolution is recommended but I had unsatisfactory results. While in your editor you can also adjust your levels to make the whites as white as possible and the blacks as black as possible.
Image2GCode
After you have your image sized and ready to go open up Image2GCode and load your image. The linked version has been modified for the Mostly Printed CNC.
Remember you are engraving the backside of the mirror so you have to flip your image horizontally so it appears the correct way on the front of the mirror. If you do not, it will be backwards and you will need to start over.
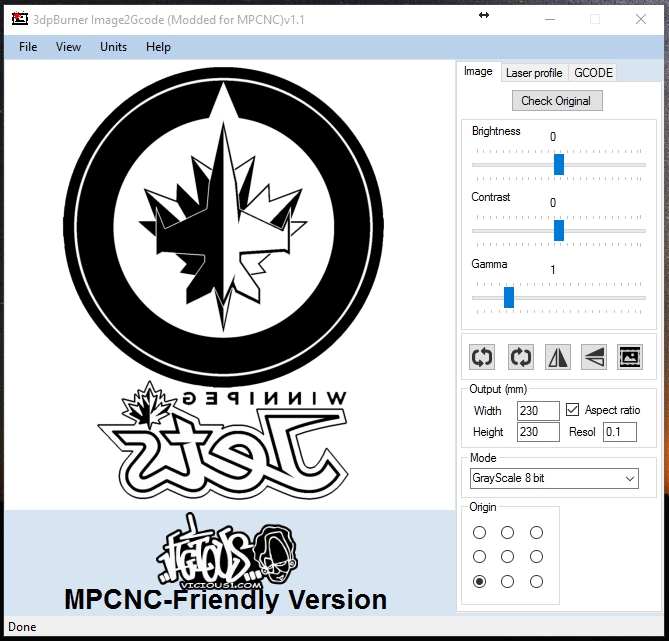
You can also Turn the gamma way down too this will help darken the blacks more if need be. You want the laser blasting as strongly as possible on the mirror.
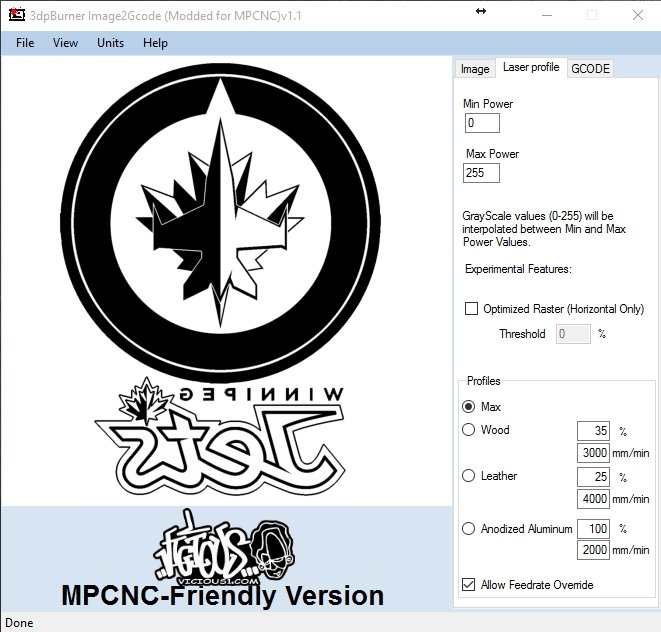
Next on the Laser profile tab you want to leave Min Power at 0 and change Max Power to 255 or
select the Max radio button. No other changes required to the defaults here.
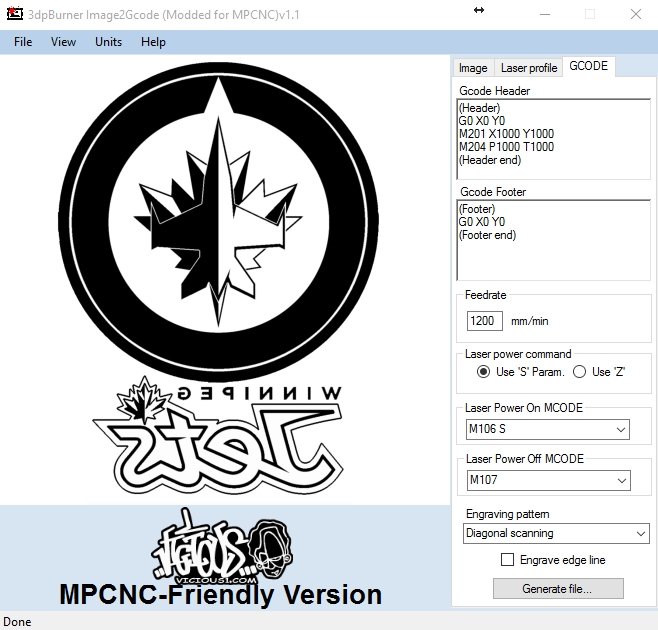
On the last and final GCODE tab there are a few changes I make here. In the Gcode header section I add the following code:
G0 X0 Y0
M201 X1000 Y1000
M204 P1000 T1000
This code turns up the default MPCNC acceleration. You may need to tweak these settings for your machine, these work well for mine.
Your feedrate may vary slightly depending on the finish of the mirror. A good starting point would
be 1200 mm/min. Click the Use S Param radio button. Type 106 Sin the Laser Power on MCODE box
and type M107 in the Laser Power Off MCODE box.
I like to use diagonal scanning for best quality. You can choose to engrave an edge line if you like or not by selecting the check box. Click Generate file, give your file a name and the GCODE will be output.
G Code Sender
Before running your file you should have already focused your laser to the height of the mirror surface.
Now you can either load the G code onto an SD card and run it from your lcd or open Repetier Host.
In repetier click -File, -Load then find your file. Setting your laser to the 0,0 point on your
mirror and click print. Several hours later you should end up with something that resembles your
file like this.
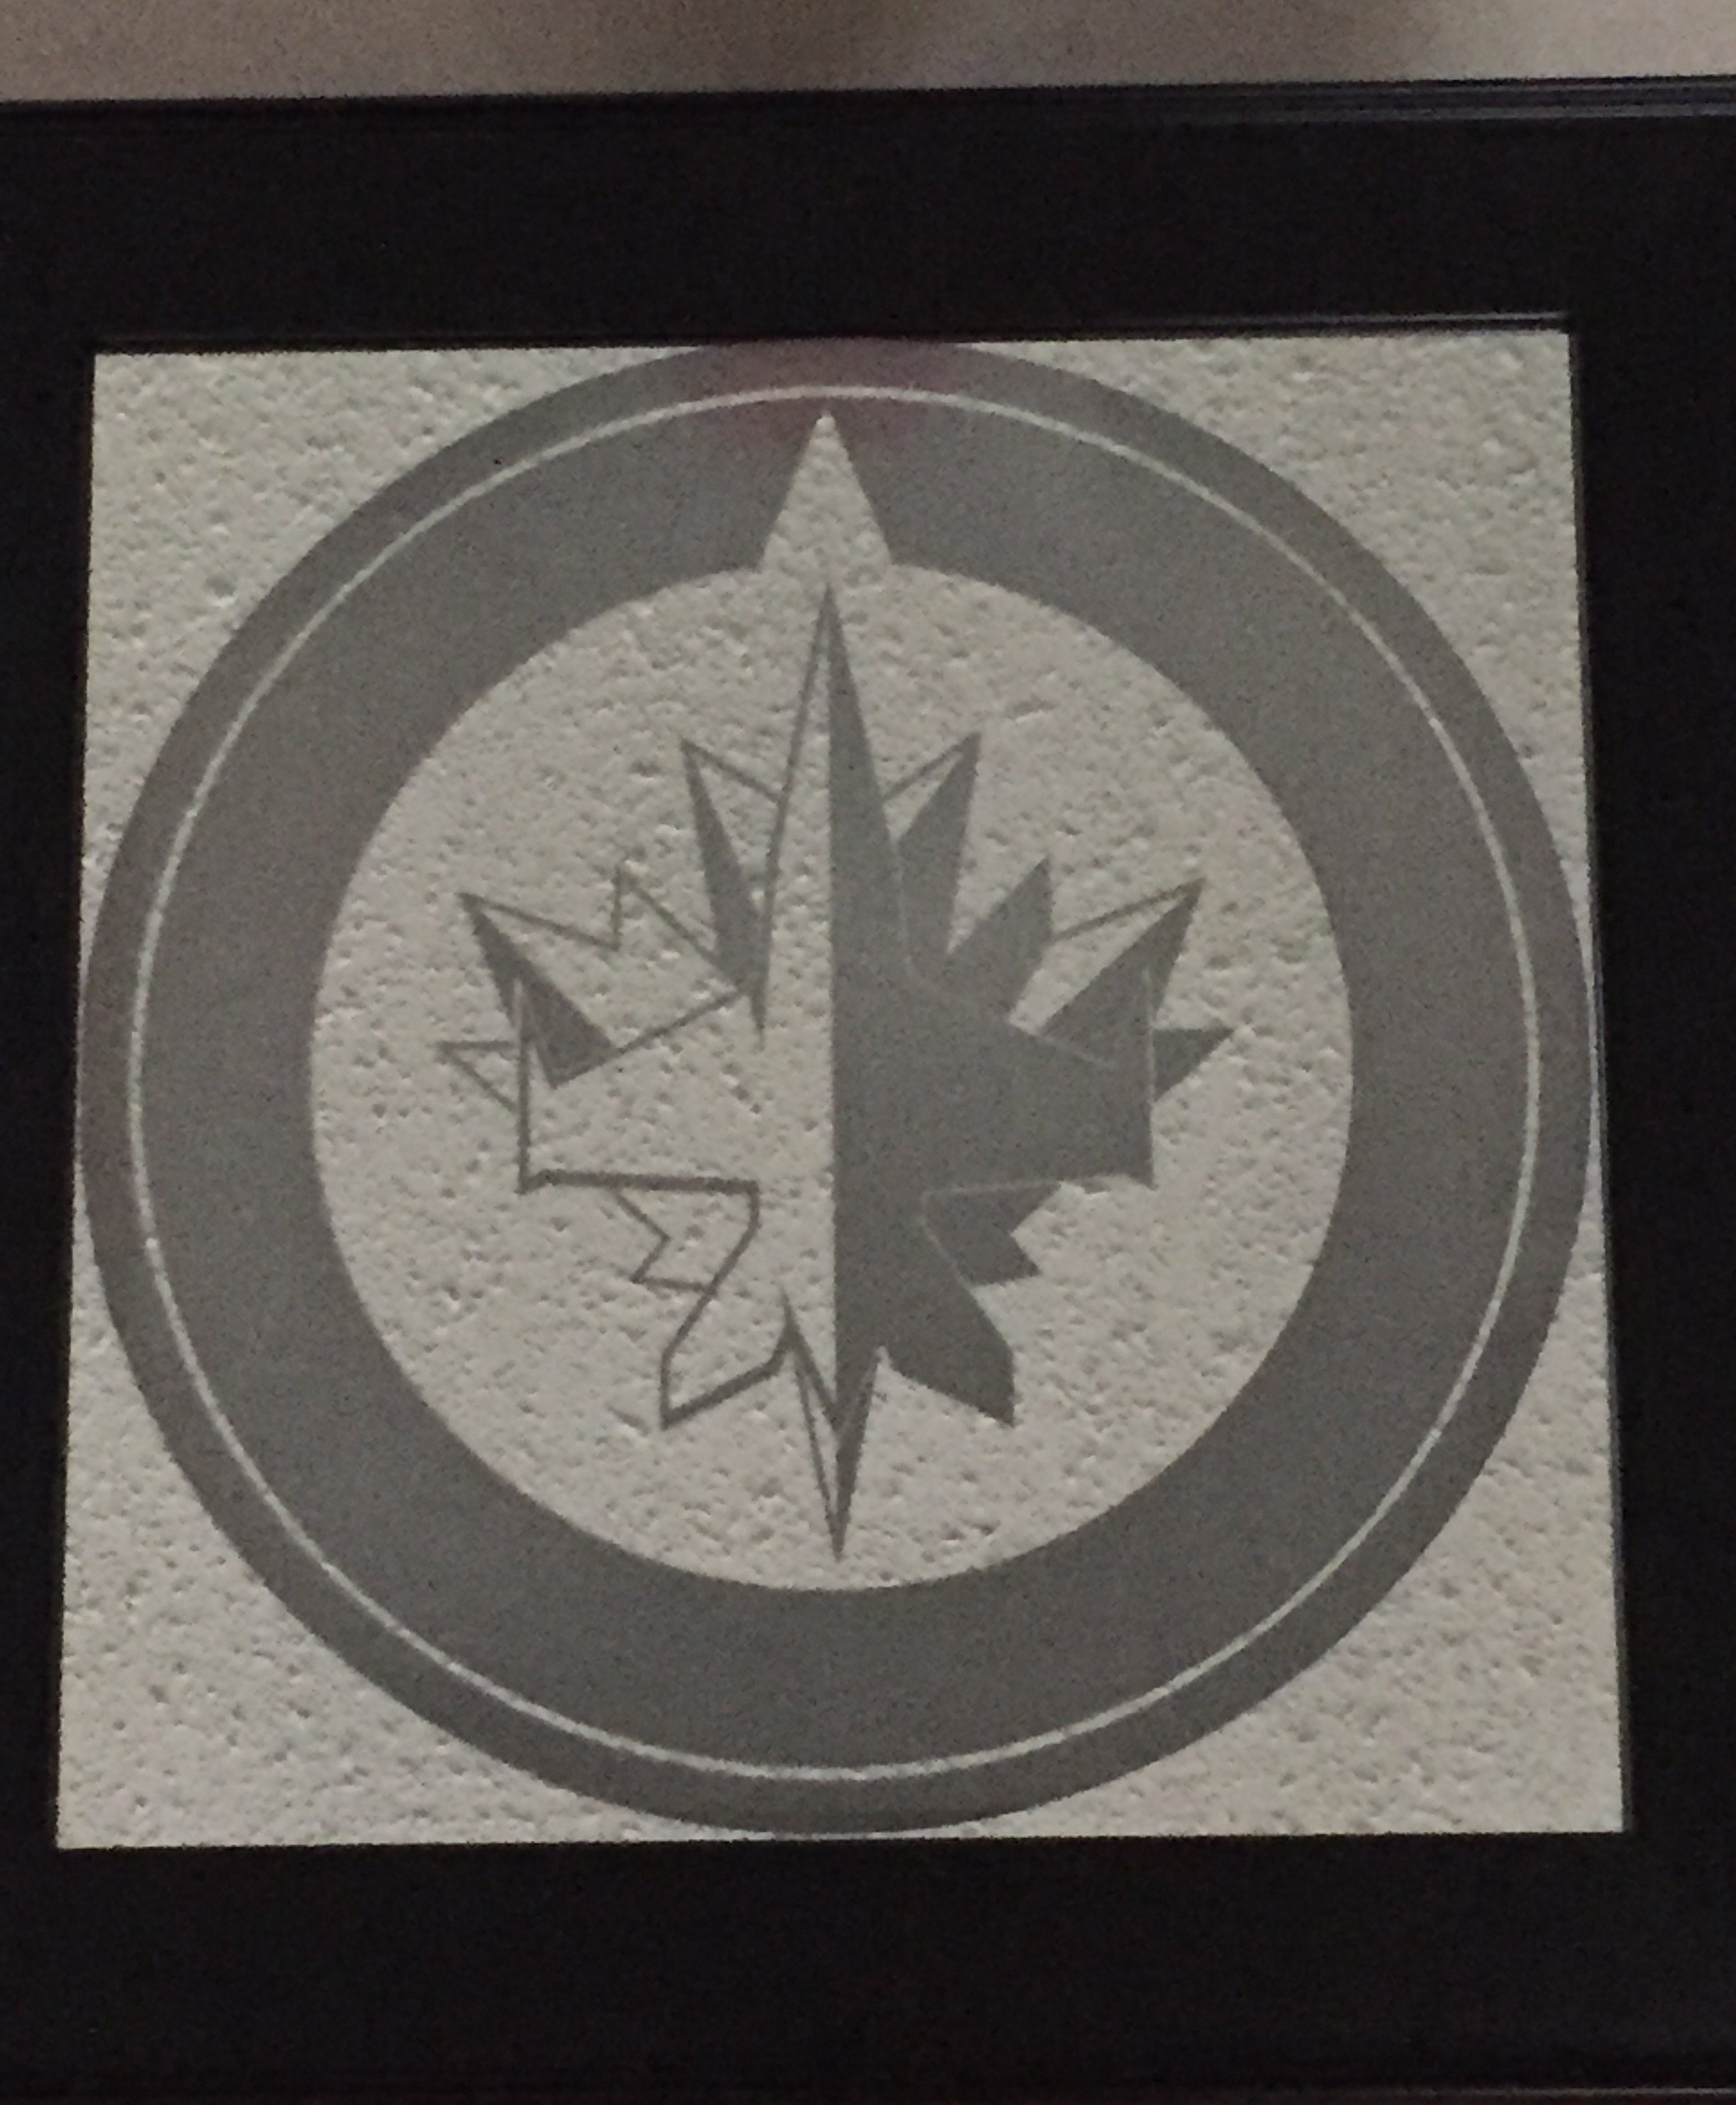
(Sorry I did not have a picture handy of the exact file I used in this example.)
Feel free to ask questions here.
Check out all the work we do @ banjags3dprinting