Needle Cutter for Foam Board
Introduction
Thin sheet foam is widely used in the model aircraft hobby, but transferring plans from a computer drawing to the material, and cutting out curves and small features is difficult to do by hand and not much fun. This tool does exactly that, much cheaper (and more safely) than a laser. It’s basically a very fast reciprocating needle – like a sewing machine – mounted on your CNC machine.
Pin a sheet of foam board onto the bed of your CNC, load in the plane’s gcode, set the origin, and start the machine. Twenty minutes or so later you have a sheet of parts that are accurately cut, easily punched out, and hot-glued together. Score cuts are no problem. You can build the cutter for about $20, but you probably have some of the parts already.

Description
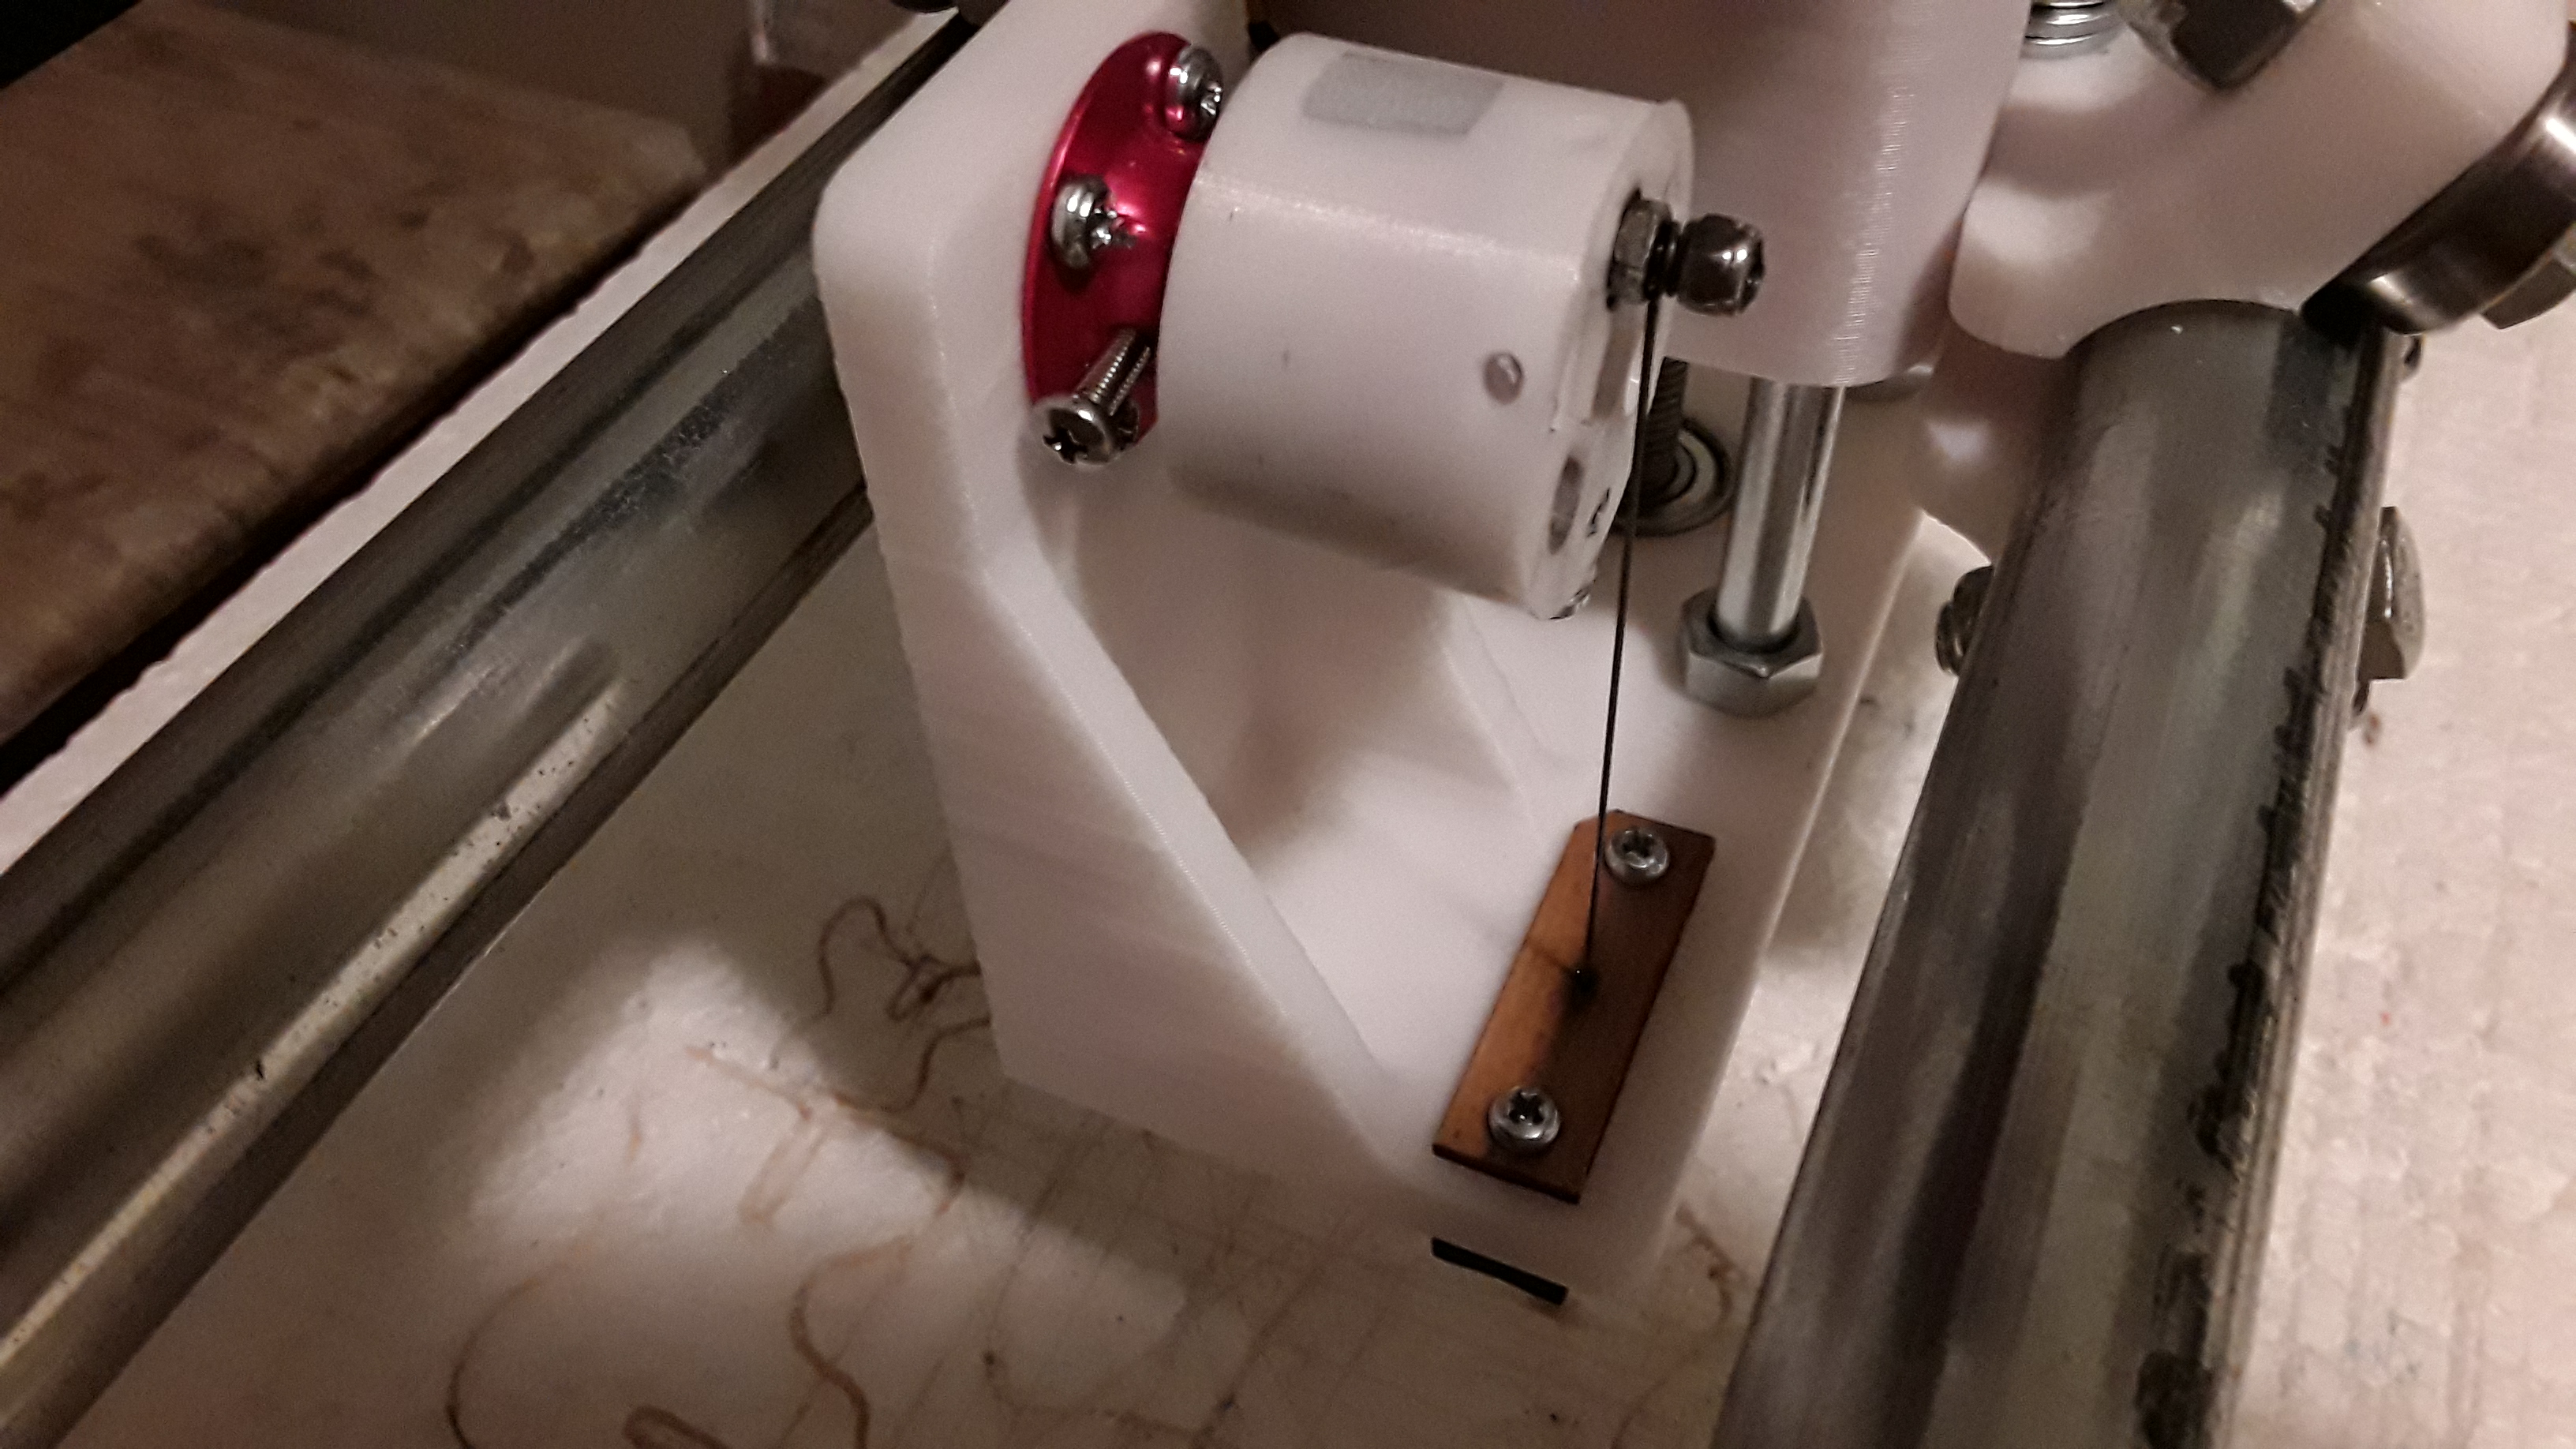
The needle is formed from a length of 0.5mm (0.025”) music-wire and attached to a small ball-bearing mounted eccentrically on the flywheel.
The flywheel is mounted on the shaft of a 2212 (stator size) brushless motor (with ESC and servo tester) and spun to create one stroke/perforation every revolution.
The needle is guided by the nozzle from a MIG welder and helped to stay straight by guide bearings. It helps to sharpen the end of the needle by rotating it at 45 degrees to an abrasive wheel.
Speeds
The important number to remember is that you need 10-15 strokes/mm to cut cleanly and limit the load on the needle, i.e. feedrate (mm/min) of ONE-TENTH the cutter speed. At 8000-10000 rpm you can use a feed rate of 600-1000 mm/min to cleanly cut DollarTree foam board (paper on), blue-cor fanfold foam, etc. in about 20 minutes. At higher speeds, the MIG tip may heat up and melt the plastic mount, and the bending load on the needle can break it at the top. If your flywheel is poorly balanced and needs to run at lower speed, reduce the feedrate accordingly.
Components
A MPCNC can be built large enough to handle a 510x750mm (20”x30”) sheet of foam board, but it won’t be stiff enough to mill aluminum. A LowRider can easily handle this size, is cheaper to build, and can be rolled aside when not in use to leave most of your bench for other work. There’s also the ERC TimSav machine and moebeast’s Foam Ripper, which are even cheaper and simpler, but harder to use for other things.
Everyone uses fairly large motors, although the actual power used is very low, around 10-20W. This is largely historical, but it is useful to have a motor with a short shaft and threaded holes to bolt on the flywheel. To minimize vibration, you want the ecentric needle bearing fairly close to the motor bearing. Long shafts and collet adapters will require lower speeds. Motors of around 1000-1200kV work well. Faster motors need to run at very low throttle, where ESC and servo testers may have poor resolution, and the RPM may hunt or surge.
The (3mm inside diameter) bearings can be harvested from broken motors, or a pack of 10 is about $2 on eBay. Washers must be small enough to not touch the outside (moving) part of the bearing. You can either start with smaller (M2.5) washers, super-glue them to some scrap wood and drill them out to 3mm, or start with 3mm washers, clamp them to a bolt and hold that in a cordless drill and run them against an abrasive wheel.
There are various ways to attach the needle to the top bearing, but by far the easiest is the 3D printed collar in moebeast’s Foam Ripper
An alternative is to enclose the bearing in the flywheel, with a free-wheeling bolt. Attaching the needle to the bolt is much easier than to a smooth bearing. The Onshape model (for a 2822 motor) is public and can be accessed here. You will probably need to adjust it to get a good fit to your motor.
More photos and a description are here
Files
There are two popular versions:
Here’s a parametric CAD drawing of the second, which can be easily edited to suit different motors in the browser based OnShape (note that you can see and use other people’s modifications):
Cutting procedure
- Place the material.
- Position the cutting head over the origin (front left corner of the board)
- Start the shop-vac.
- Start the cutter motor.
- Wind the Z-axis down until you can hear it just touch the surface.
- Select print file from the SD card.
Vacuum hold down
It is important that the foam board does not move during the cutting process. Pins and tape can work, but ideally you should have a fixed frame, into which the board fits. Foam board is also often bowed, and the cutter works best when it is flat (and score cuts require a predictable depth). The vacuum pad solves both problems.
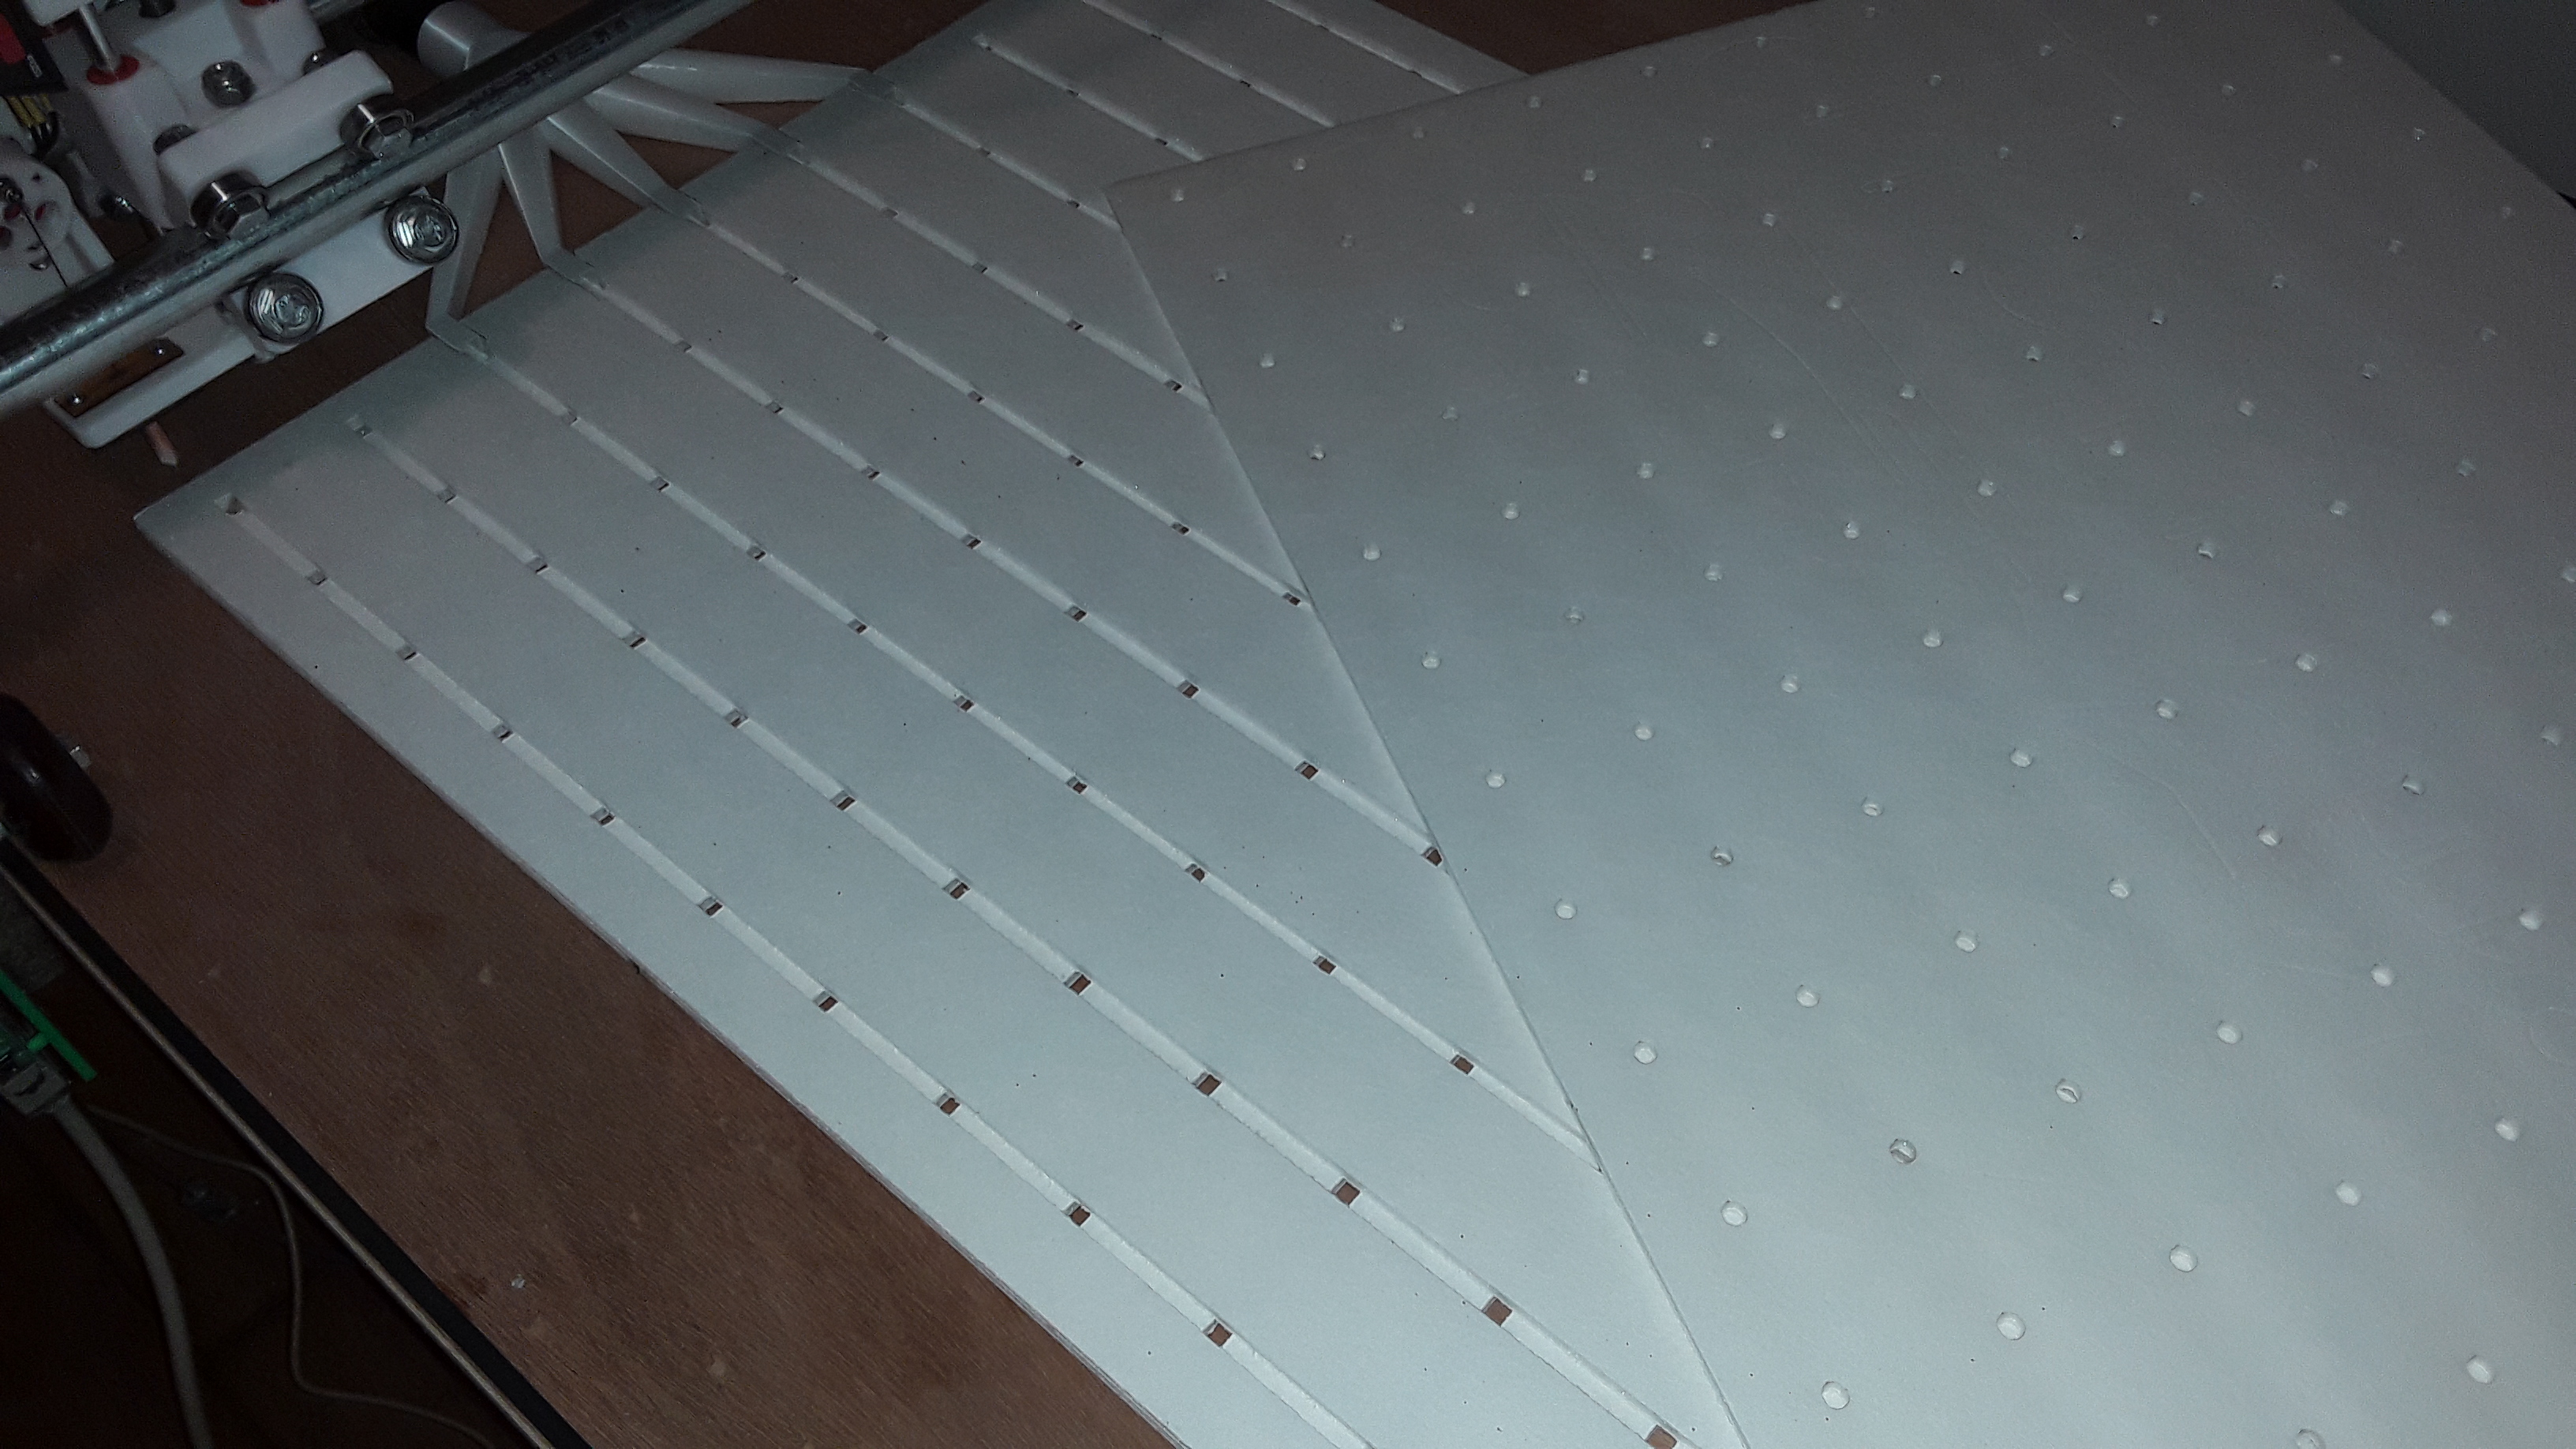
The vacuum pad consists of three sheets of DTFB (Dollar Tree Foam Board): two slotted sheets (glued together) with a loose “holes” sheet that serves as the replaceable spoil board. The 3-layer stack sits on the work surface, with nothing between, and the vacuum pad not only pulls down the foam workpiece but also pulls itself down against the work surface.
The shop-vac noise can be reduced with an inexpensive router speed control to reduce the speed. Use full power for a second to suck the work down, then reduce to minimum power.
Here are DXF plans for the 3 sheet pad - although you need a working needle cutter to use them. It may be easier and faster to cut the first two with a craft knife and use the machine to make the grid of holes in the third sheet.
Moebeast’s Foam Ripper contains an STL for the manifold vacuum nozzle, or you can build a square funnel shape from foam board.
Resources:
- Probably the largest discussion about the development of this cutter is on the FliteTest forum: Cutting foam sheets with a needle
- Post #2,439 with photos of the vacuum pad
- Videos on how to use InkScape and Estlcam to prepare files for cutting
- Video showing how to re-arrange parts to use your material more efficiently