Firmware
Note
If you’re looking to flash Marlin Firmware for a V1Engineering machine, start here.
Marlin Firmware is moving away from the Arduino IDE and has started using PlatformIO.
But these arduino instructions may be useful for someone, so we have archived them here. Some of the details may be out of date.
Archived Arduino IDE instructions
Using GitHub
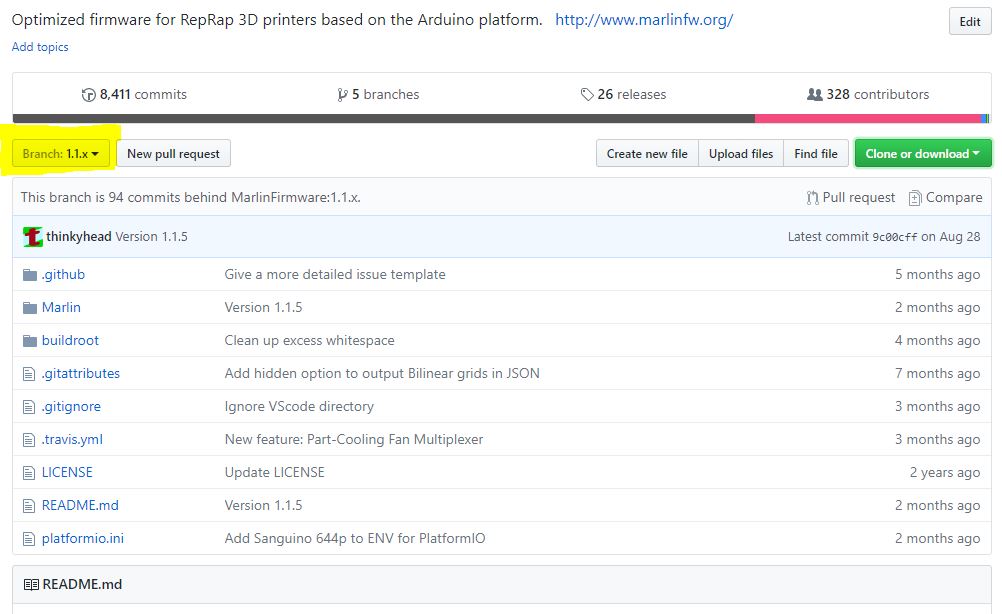
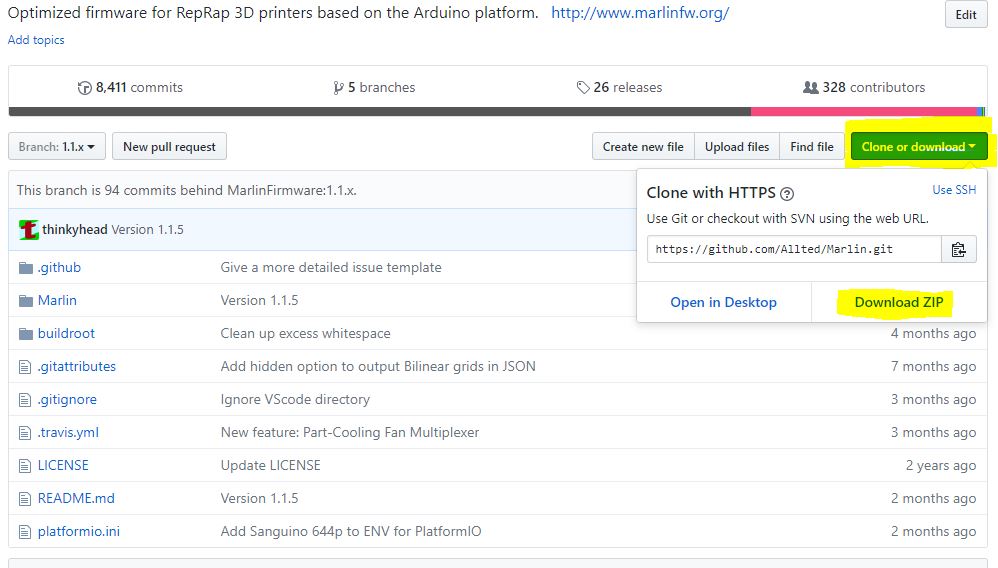
You will find this on the V1 Engineering Marlin GitHub page.
| In case you have never used GitHub, the first drop down lets you select the firmware version you want. | The next step is download the firmware you selected. Click on “Clone or Download”, then click on “Download Zip”. |
|---|---|
 |
 |
Naming key
All versions have the full graphic LCD enabled. I can add links to all of these if it is still unclear.
Machine type_Board_Details
Machine type– MP3DP, V1CNC=MPCNC & LowRider, ZenXY
Boards– Mini-Roambo, Full Rambo, Archim1, Archim2, Ramps
Details– 16T=16tooth pulley, T8=Leadscrew type, 16/32step=Step rate the firmware is set to, Dual Endstop=MPCNC specific edits, Aero/MK=base extruders they are set to.
Marlin Change log
1/20/20 - 418, Arcs fixed, more default current fresh start from 2.0.1+
4/27/19 – 401-402, 600+changes (Marlin catch up), enabled eeprom, lowered Z accel (MPCNC/LowRider), driver fixes.
12/17/18 – 303 Archim1 boards only, LCD/USB fix. Thanks Jason&Ultimachine.
11/28/18 – 302
- Added 3 menus, G92 XYZ, Home Z, Home XY. (Maybe I should use “Zero” instead of home or reference :p)
- No easy workaround for the flashing ???’s…The “right way”
- Dual firmware’s get disable softstop menus.
- 20 minute stepper hold after activation / gcode completion.
- Remember G0, G1, G2…. (might help with poor post processors) Can’t enable the G0 default rapids because we need a separate for the Z axis. If I enable this by default we would be working with the Z max unless otherwise specified in the gcode. Might be a good thing.
- Junction deviation set at smoothie recommended 0.005 for CNC’s (gunna need some testing).
- Enabled S_Curve_deviation.
- LCD timeout set to 45 seconds instead of 15.
- CNC coordinate systems enabled.
- Added a little versioning number to the LCD boot screen or repetier connect info. This will help easily identify what firmware people are using and if there are ever issues we can flag it.
 |
 |
|---|---|
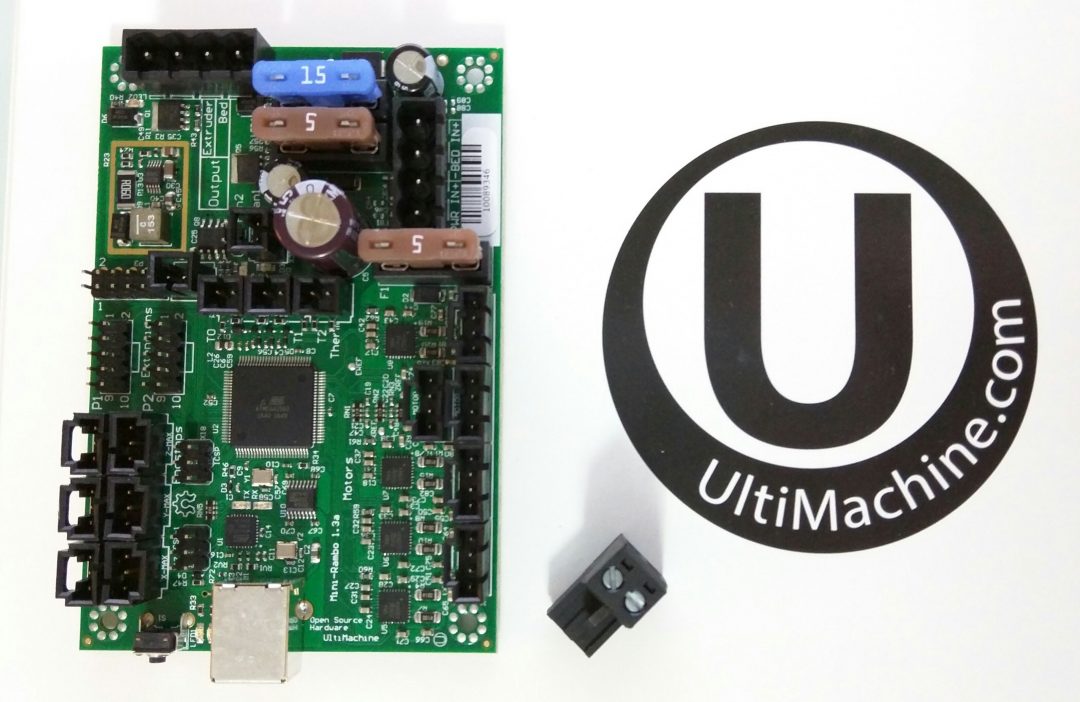
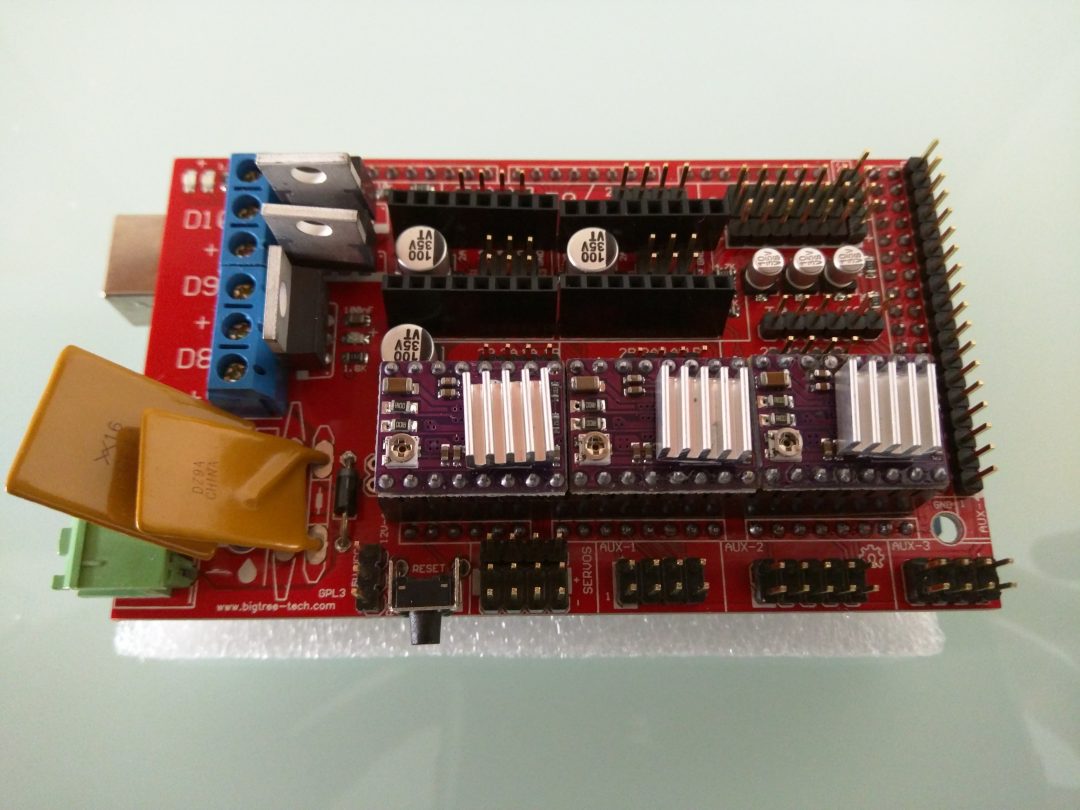
| Ultimachine Boards | Ramps |
Change log
9/15/16- Initial release
GRBL
The X and Y steppers are wired in series (or parallel) and wired to a single port. The picture below is an example of a board running GRBL. Many other boards are available. First board I ever bought…..one of these days…
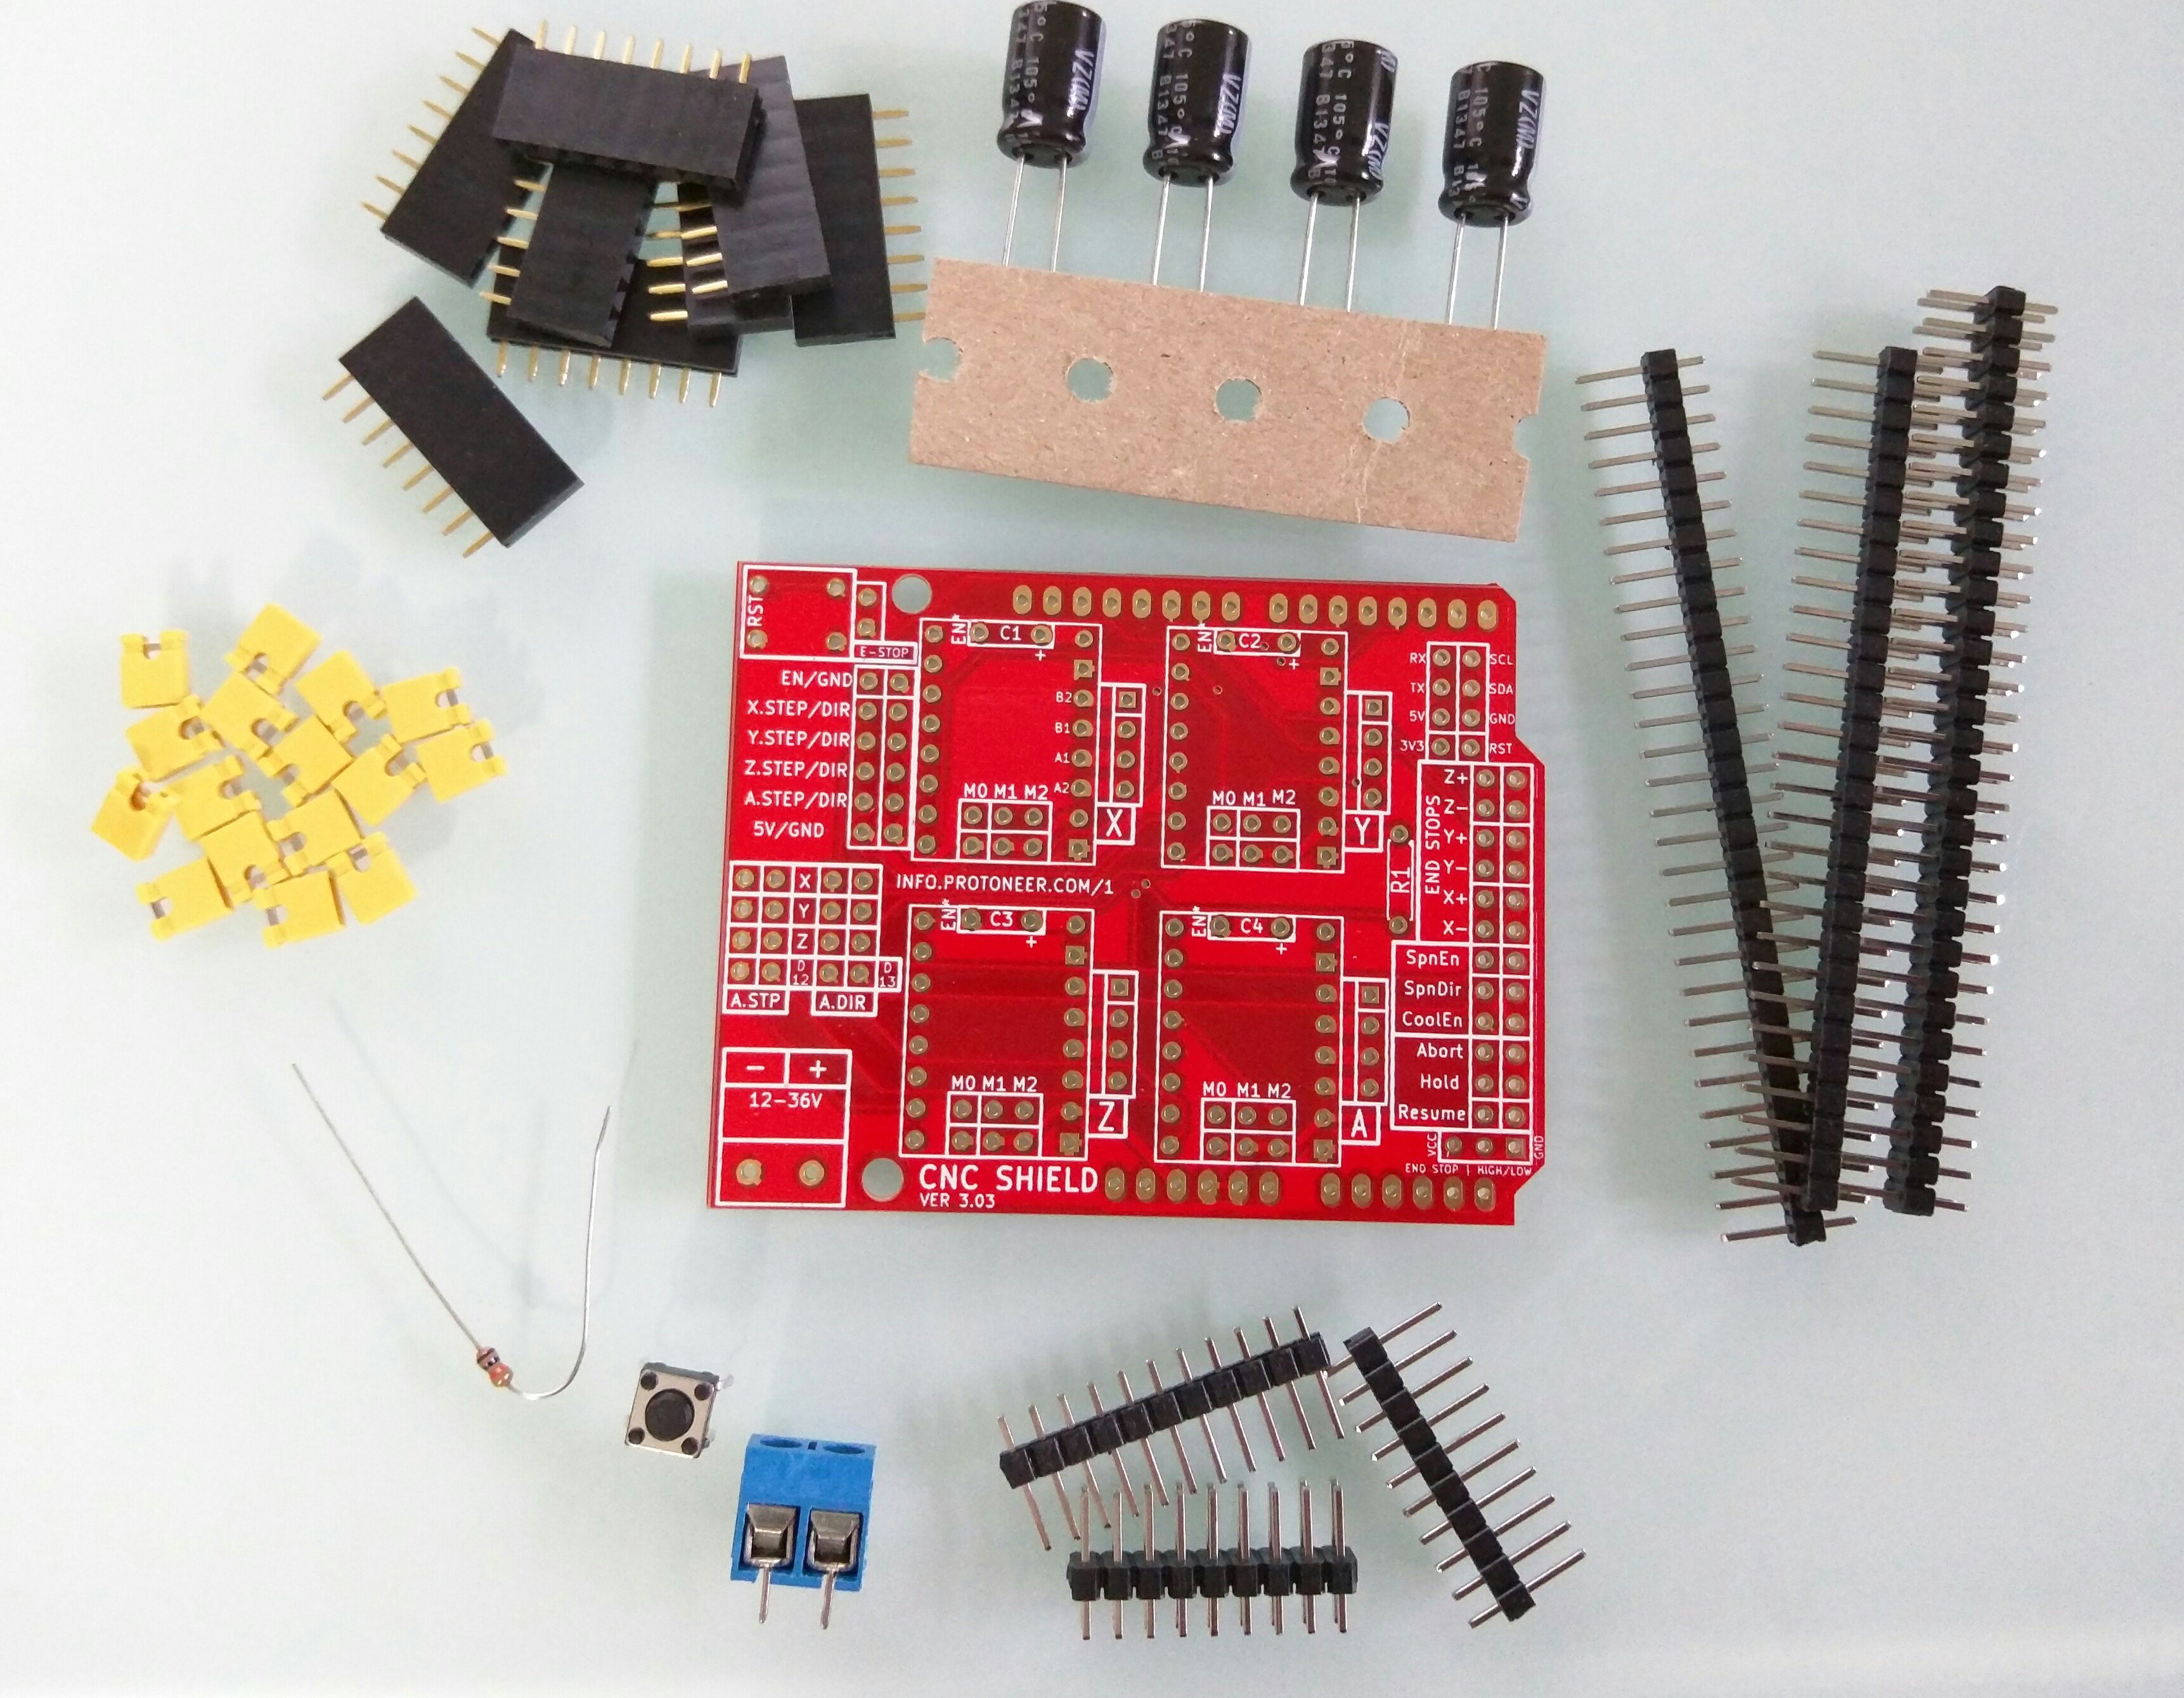
Sorry I do not have a config for this yet.
How to Flash
How to flash firmware on the Mini-Rambo (or Rambo)
- Install the Arduino software and its drivers before you plug in your board.
- You will then need to plug in both USB and 12V power.
- Unzip the firmware you need from above
- Open arduino
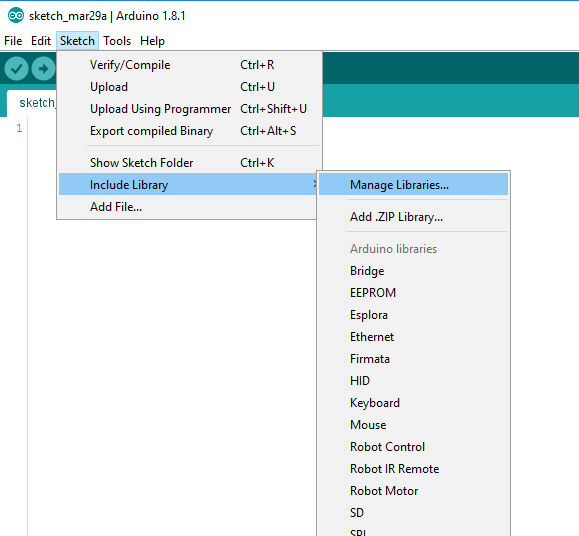
- Sketch-Include Library-Manage Libraries
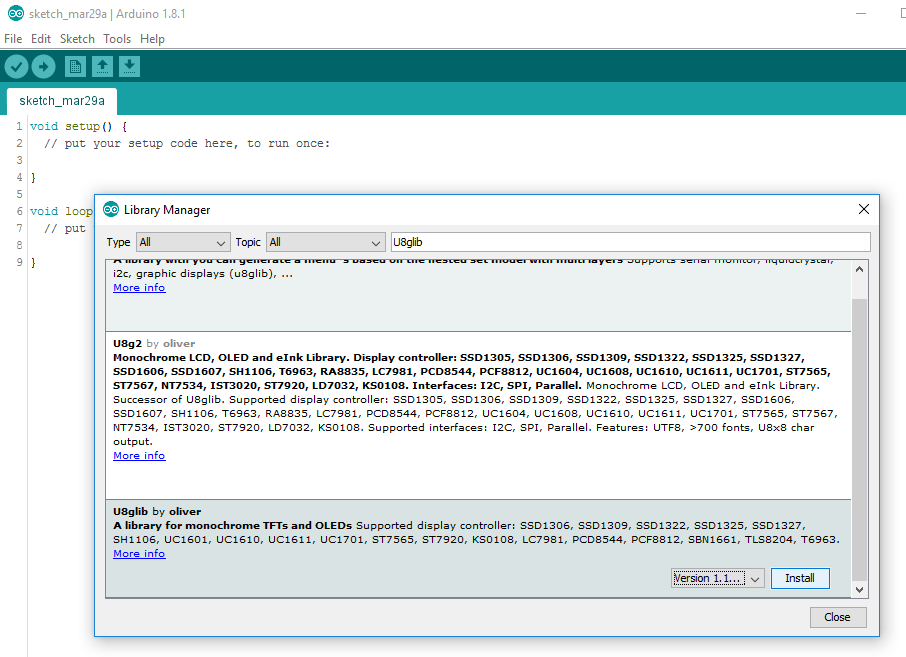
- Type “U8glib” in the search box, hit enter, select U8glib, select the number with the highest
version, Install. This has never been easier.
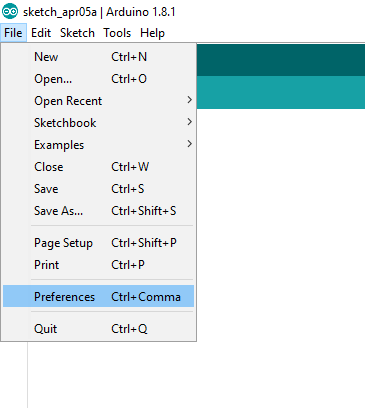
- File- Preferences
- In “additional boards manager url” paste
https://raw.githubusercontent.com/ultimachine/ArduinoAddons/master/package_ultimachine_index.jsonHit “ok”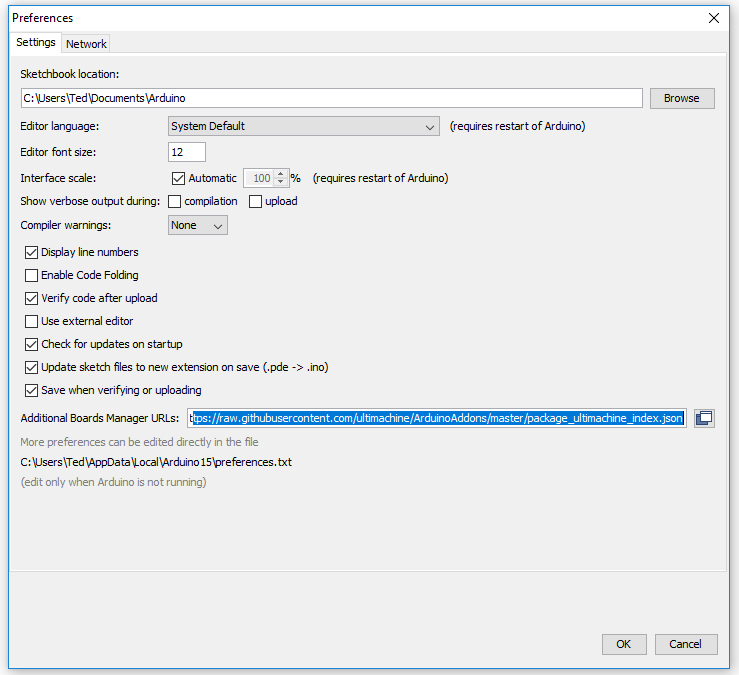
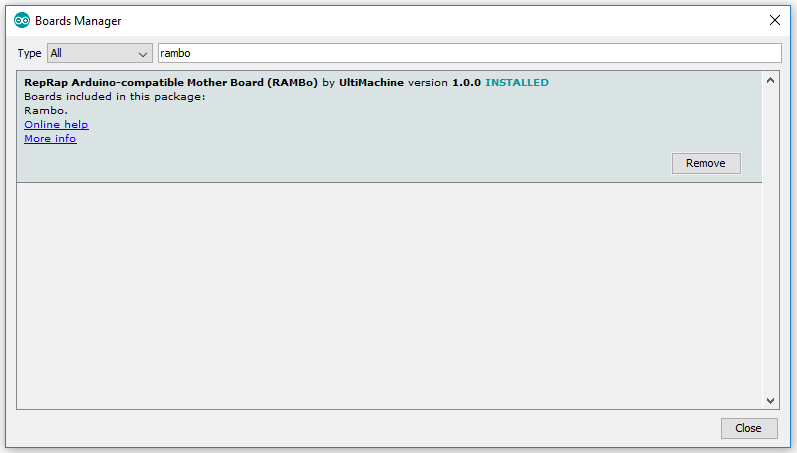
- Tools-Board-Boards Manager
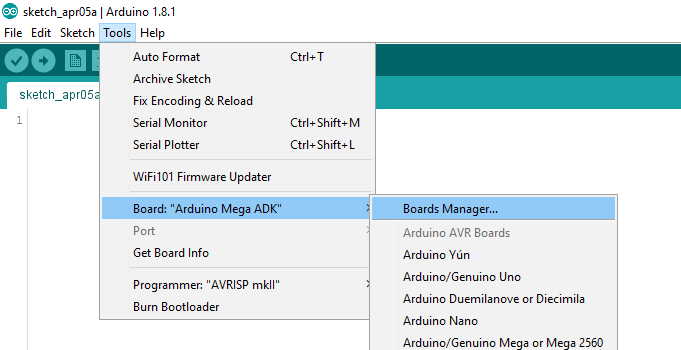
- Search and install, “rambo”
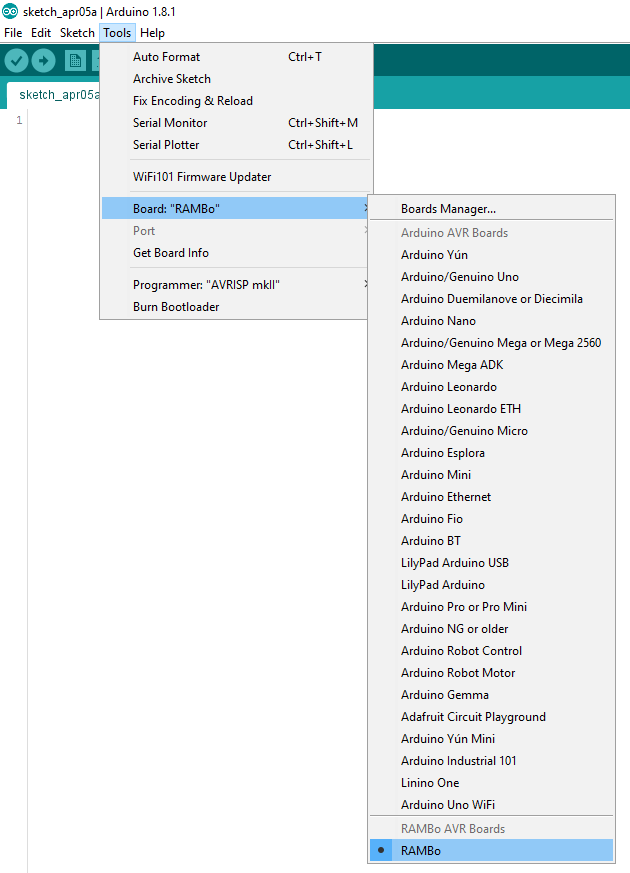
- Tools-Board-Rambo
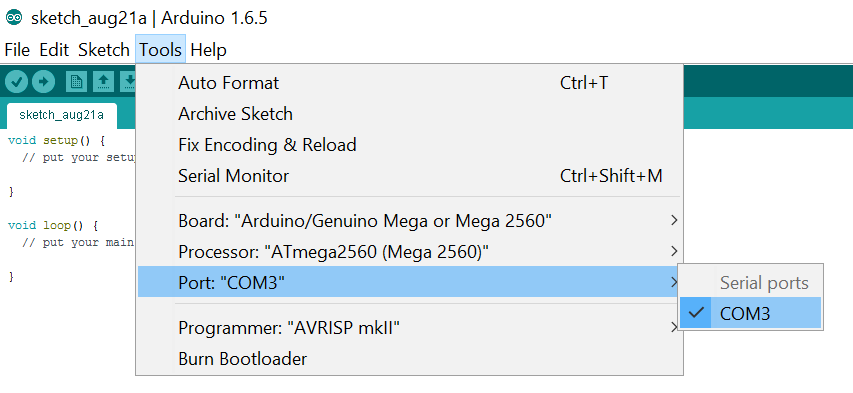
- Tools- Port (whatever port your board shows up in)
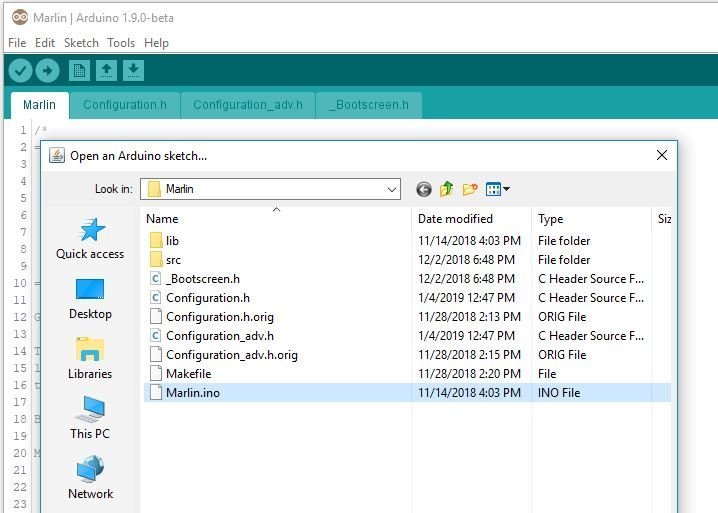
- Open the firmware folder and select the current Marlin.ino file
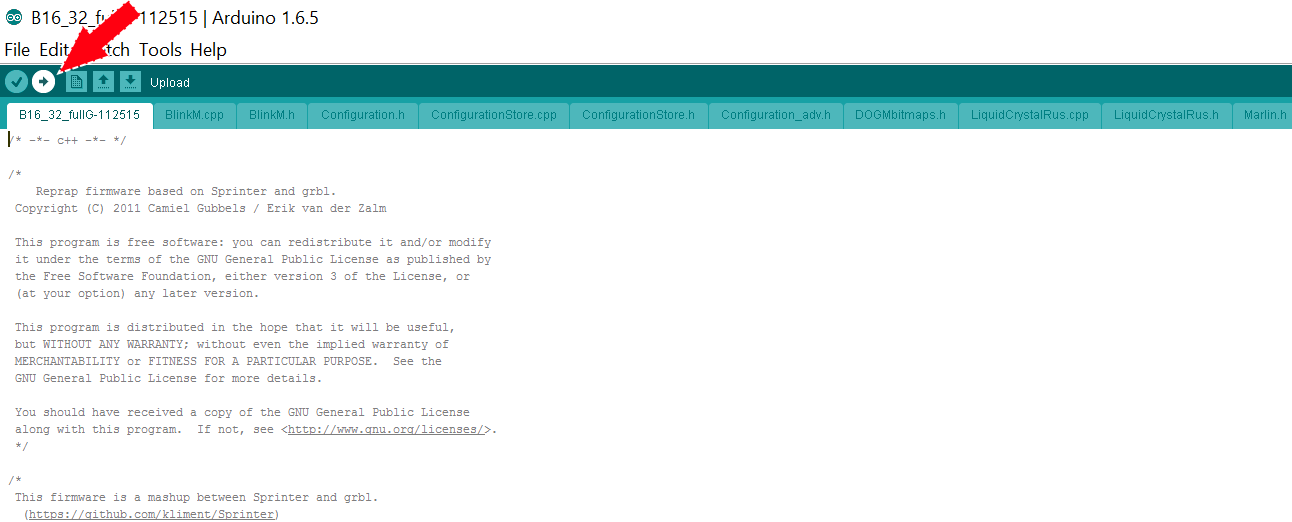
- Click on the Upload arrow and watch the progress bar at the bottom
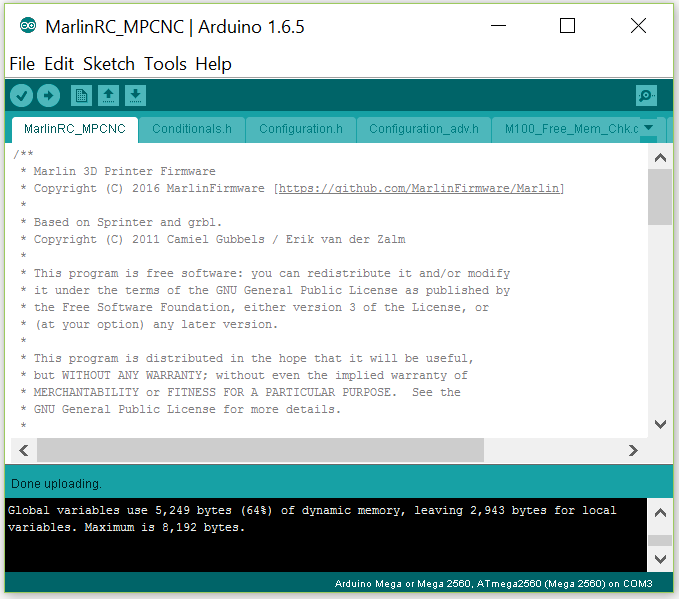
- The bottom of the window will say “done uploading” when it is finished done
- If you get a boot loader error, it is okay.
How to flash firmware on the Ramps 1.4
- Install the Arduino software and its drivers before you plug in your board.
- Unzip the firmware you need from above
- Open Arduino
- Sketch-Include Library-Manage Libraries
- Type “U8glib” in the search box, hit enter, select U8glib, select the number with the highest
version, Install. This has never been easier.
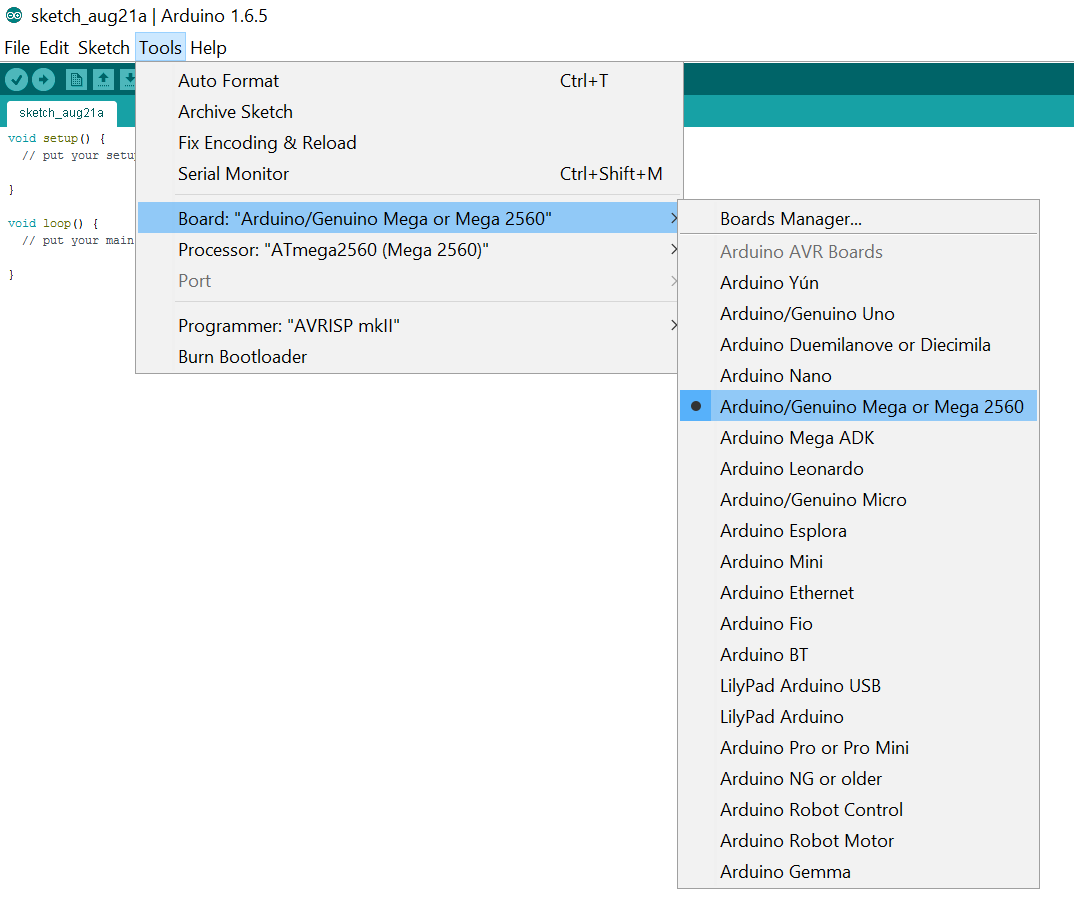
- Tools-Board-Mega 2560
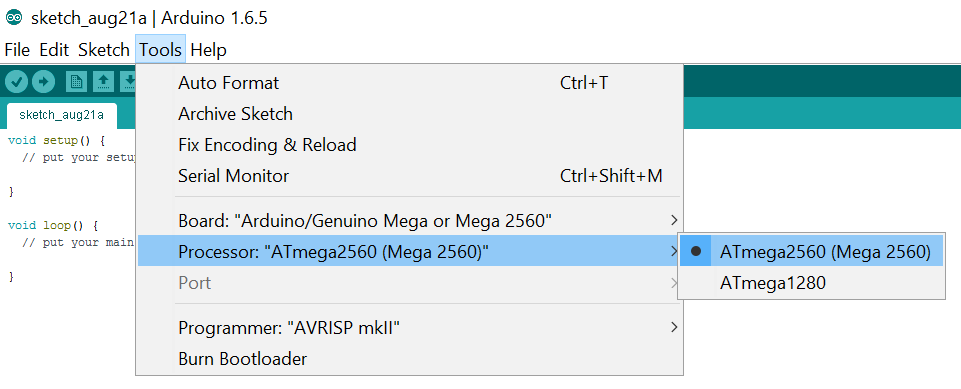
- Tools-Processor
- Tools- Port (whatever port your board shows up in)
- Open the firmware folder and select the current Marlin.ino file
- Click on the Upload arrow and watch the progress bar at the bottom
- The bottom of the window will say “done uploading” when it is finished done
How to flash firmware on the Archim
- Install the Arduino software and its drivers before you plug in your board.
- You will then need to plug in both USB and 12V power.
- Unzip the firmware you need from above -Make sure you do not have U8glib in your Arduino Library folder
- File- Preferences
- In “additional boards manager url” paste
https://raw.githubusercontent.com/ultimachine/ArduinoAddons/master/package_ultimachine_index.jsonHit “ok” - Tools-Board-Boards Manager
- Search and install, “archim”
- Tools-Board-archim
- Tools- Port (whatever port your board shows up in)
- Press and hold the erase button on the Archim board for 5 seconds.
- Wait 30 seconds then press the reset button on the Archim
- Open the firmware folder and select the current Marlin.ino file
- Click on the Upload arrow and watch the progress bar at the bottom
- The bottom of the window will say “done uploading” when it is finished done